WordPress的自定义文章类型在开发一款WordPress主题的时候是经常会用到的,那么该如何创建一个新的自定义文章类型(PostType)呢?下面悟空搜给大家介绍下。
创建PostType
创建一个新的 PostType 需要使用 register_post_type 函数,在你主题的 functions.php 文件下调用该函数:
2
3
4
5
6
7
8
//$post_type 参数就是你自定义 Post Type 的名称。
function my_custom_post_product() {
$args = array();
register_post_type( 'product', $args );
}
add_action( 'init', 'my_custom_post_product' );函数的参数很多,下面只列出比较常用的参数:
2
3
4
5
6
7
8
9
10
11
12
13
14
15
16
17
18
19
20
21
22
23
24
25
26
27
$labels = array(
'name' => _x( '网址导航', 'post type 名称' ),
'singular_name' => _x( '网址', 'post type 单个 item 时的名称,因为英文有复数' ),
'add_new' => _x( '新建网址', '添加新内容的链接名称' ),
'add_new_item' => __( '新建网址' ),
'edit_item' => __( '编辑网址' ),
'new_item' => __( '新网址' ),
'all_items' => __( '所有网址' ),
'view_item' => __( '查看网址' ),
'search_items' => __( '搜索网址' ),
'not_found' => __( '没有找到有关网址' ),
'not_found_in_trash' => __( '回收站里面没有相关网址' ),
'parent_item_colon' => '',
'menu_name' => '网址'
);
$args = array(
'labels' => $labels,
'description' => '网址信息',
'public' => true,
'menu_position' => 5,
'supports' => array( 'title', 'editor', 'thumbnail', 'excerpt', 'comments' ),
'has_archive' => true
);
register_post_type( 'site', $args );
}
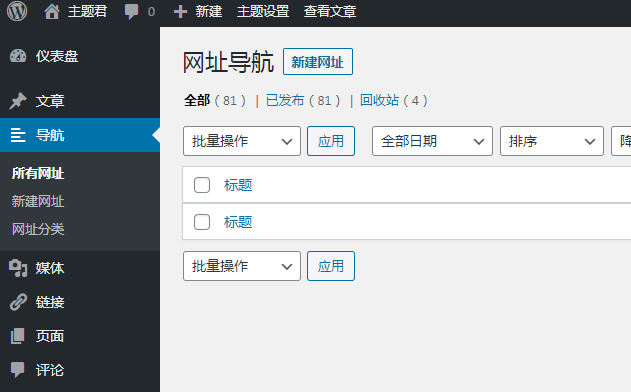
add_action( 'init', 'my_custom_post_site' );将上面代码加到主题
的最下面,进入后台你会发现多出了
这时我们可以在新建的
发表一篇网址类型的文章了。但是这样与文章类型基本相同,我们需要更多的自定义来完善我们的
添加分类功能需要使用函数 register_taxonomy,使用方法也很简单,跟注册 Post Type 函数类似,只不过多了一个参数用来指定对应的 Post Type :
就本按理而言,可以配置如下常用参数:
2
3
4
5
6
7
8
9
10
11
12
13
14
15
16
17
18
19
20
21
$labels = array(
'name' => _x( '网址分类', 'taxonomy 名称' ),
'singular_name' => _x( '网址分类', 'taxonomy 单数名称' ),
'search_items' => __( '搜索网址分类' ),
'all_items' => __( '所有网址分类' ),
'parent_item' => __( '该网址分类的上级分类' ),
'parent_item_colon' => __( '该网址分类的上级分类:' ),
'edit_item' => __( '编辑网址分类' ),
'update_item' => __( '更新网址分类' ),
'add_new_item' => __( '添加新的网址分类' ),
'new_item_name' => __( '新网址分类' ),
'menu_name' => __( '网址分类' ),
);
$args = array(
'labels' => $labels,
'hierarchical' => true,
);
register_taxonomy( 'sitecat', 'site', $args );
}
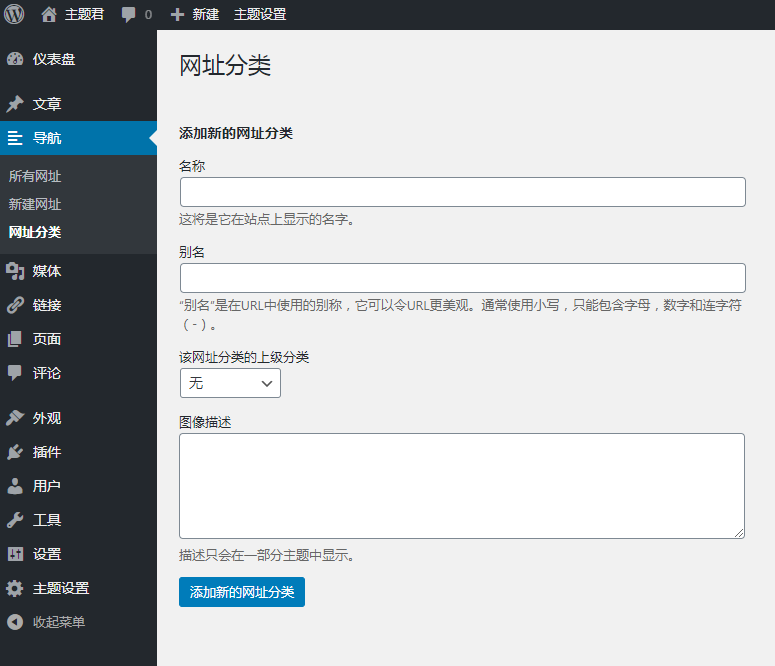
add_action( 'init', 'my_taxonomies_site', 0 );添加到主题之后,我们看到出现了熟悉的文章分类功能,只不过上面的文案全部变成我们自定义的内容了:
为 Post Type 添加自定义 Meta Box
我们想要添加的网址导航类型不能仅仅只有文章内容,我们还需要额外添加一些 网址链接 之类的有关内容。那么就需要添加自定义 Meta Box,Meta Box 可以在文章发表页面中添加自定义的表单,编写文章的时候可以填写额外的信息然后在前端调用出来。
自定义 Meta Box 需要用到 add_meta_box 函数:
接下来注册一个 Meta Box :
2
3
4
5
6
7
8
9
10
11
function site_director() {
add_meta_box(
'site_director',
'网址链接',
'site_director_meta_box',
'site',
'side',
'low'
);
}然后在配置参数里面指定了回调函数
,我们需要在这个函数里面创建表单:
2
3
4
5
6
7
8
9
10
11
12
13
14
15
16
17
18
19
20
21
22
23
24
25
26
27
28
29
30
31
32
33
// 创建临时隐藏表单,为了安全
wp_nonce_field( 'site_director_meta_box', 'site_director_meta_box_nonce' );
// 获取之前存储的值
$value = get_post_meta( $post->ID, '_site_director', true );
?>
<label for="site_director"></label>
<input type="text" id="site_director" style="width:100{5cc1b29162d549a8071384de182cc9fc6e6a0fd85e7907f22fd9e18cff4269c3}" name="site_director" value="<?php echo esc_attr( $value ); ?>" placeholder="输入网址链接" >
<?php
}
add_action( 'save_post', 'site_director_save_meta_box' );
function site_director_save_meta_box($post_id){
// 安全检查
// 检查是否发送了一次性隐藏表单内容(判断是否为第三者模拟提交)
if ( ! isset( $_POST['site_director_meta_box_nonce'] ) ) {
return;
}
// 判断隐藏表单的值与之前是否相同
if ( ! wp_verify_nonce( $_POST['site_director_meta_box_nonce'], 'site_director_meta_box' ) ) {
return;
}
// 判断该用户是否有权限
if ( ! current_user_can( 'edit_post', $post_id ) ) {
return;
}
// 判断 Meta Box 是否为空
if ( ! isset( $_POST['site_director'] ) ) {
return;
}
$site_director = sanitize_text_field( $_POST['site_director'] );
update_post_meta( $post_id, '_site_director', $site_director );
}添加自定义字段:
2
3
4
5
6
7
8
9
10
11
12
13
14
15
16
add_filter("manage_edit-site_columns", "site_edit_columns");
function site_custom_columns($column){
global $post;
switch ($column) {
case "site_director":
echo get_post_meta( $post->ID, '_site_director', true );
break;
}
}
function site_edit_columns($columns){
$columns['site_director'] = '网址';
return $columns;
}显示 Meta Box 内容
实用 WP_Query 高度自定义调用 Post Type 的内容:
2
3
4
5
6
7
8
9
10
$loop = new WP_Query( $args );
while ( $loop->have_posts() ) : $loop->the_post();
the_title();
echo '
<div class="entry-content">';
the_content();
echo '</div>';
endwhile;
扫码关注wp悟空搜
精选优质免费WordPress主题模板,分享最新WordPress实用建站教程!
记住我们的网址:ztJun.com
原文链接:https://xiaohost.com/1165.html,转载请注明出处。


评论4