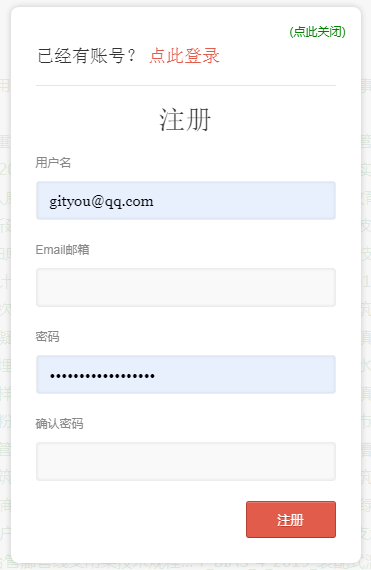
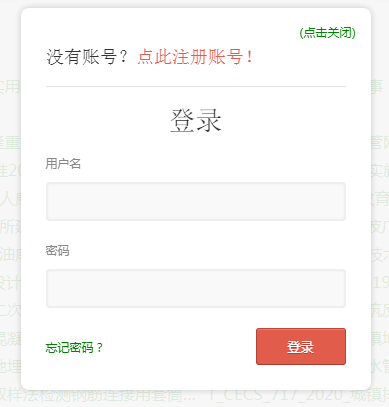
功能截图如下


先讲讲怎么用,文末有所需文件打包
将custom-ajax-auth.php文件放入你主题的includes目录
在function.php文件中引入custom-ajax-auth.php,也可以放入其他目录,注意路径修改为你的即可
1 | require_once( get_template_directory() . '/inclues/custom-ajax-auth.php' ); |
将ajax-auth.php放入主题的根目录
将ajax-auth-style.css(注册/登录框样式)文件放入你主题的css目录内
如果没有,放入其他目录也可以,但是需要修改custom-ajax-auth.php文件中的引入css路径,在哪儿修改?看下面

将ajax-auth-script.js(ajax提交信息)和jquery.validate.js(验证信息的js)文件放入你主题的js目录
如果没有这个js目录,也可以放入其他文件夹或者根目录,但是要修改修改custom-ajax-auth.php文件中的引入js的路径,如第2步的截图所示,修改成你自己的路径即可
在你主题中需要设置登录/注册按钮的任意地方,添加以下代码
1 2 3 4 5 6 7 8 | <?php if (is_user_logged_in()) { ?> <a href="<?php echo wp_logout_url( home_url() ); ?>">退出</a> <?php } else { get_template_part('ajax', 'auth'); ?> <div style="width:100%;height:40px;overflow:hidden;"> <a style="width:48%;height:40px;line-height:30px;text-align:center;font-size:1rem;display:inline-block" class="login_button" id="show_login" href="">登录</a> <a style="width:48%;height:40px;line-height:30px;text-align:center;font-size:1rem;display:inline-block" class="login_button" id="show_signup" href="">注册</a> </div> <?php } ?> |
好了,重启php,刷新页面即可看到效果了
下载附件:前台JQuery弹出注册登录修改密码框
原文链接:https://xiaohost.com/3687.html,转载请注明出处。


评论0